top of page
Lifestyle Icon.png

 Blog

The long-awaited paper documentation of my Universal solo trip is now here! I am excited to show you how I brought the fun of the theme parks to today's page. This is also part of my collaboration with Sara Scraps for Summer of Stories. You can check out her video here on her channel! As we document our summer memories, be sure to subscribe so you don't miss out!


Let's hop right on into today's star-studded scrapbook layout.


There is something about the glitz and glam of Hollywood and movies that scream stars! As many of you may know, part of Universal Orlando is Universal Studios - a Hollywood-themed park with areas that bring you right into the movies. To capture this I went all out. Stars, stars everywhere.


I adored this star paper from Crate Paper that is part of my July HTKAKWS kit but thought it may be a bit overwhelming as a full background. I dug through my crafty stash and pulled out some colored cardstock options. Originally, I had intended on only using one of the blues I grabbed but figured I should tear into more of my stash rather than less. So, I tore into both the star paper and the bright blue cardstock for some texture and layers.


Fitting 5 photos on a page isn't necessarily simple, but I think I am getting the hang of it. Who knew having your own photo printer at home would be such a game-changer! The 3x4" size is quickly becoming a staple on all of my 12x12 pages. What's the smallest size photo you have ever included in your memory keeping?


Once I had an idea of how I would arrange the photos the lengthy process of embellishing began. I always note that my embellishment process seems to be quite sporadic. Jumping from one idea to the next as quickly as possible. Capturing the essence of a theme park visit through one page meant lots of embellishments. While I may not have any themed indicators like a roller coaster sticker or ferris wheel, the bright colors and fun textures help give an upbeat and interesting mood and feel.


This may just be the layout that made me fall back in love with stamping. Although super simple additions, stamping the title then led me to go dig out some more stamps I could utilize! Do you usually stamp on a majority of your layouts? I would like to start doing so. I have so many stamps and they are so versatile!


My first trip back to Universal Orlando may have been short, but I am glad I could take you all along for the journey! You can watch the vlog here if you missed it! I think my bold color combo of yellow and blue helps the blue sky shine among all of the theme park icons. I hope you get the theme park vibes as I do from this page. Let me know what you think in the comments below!


Supply List:*Purchasing through some of these links is part of an affiliate program and I will receive a small portion of the sale at no additional cost to you.


Back in May, I had the chance to visit a theme park for the first time in over a year! I wasn't in a rush to get back since we are still in a pandemic, but since I have been fully vaccinated for over a month at my point of visit and I had a random afternoon off from work, I took the opportunity to check it out! So come along and have some fun as I explore!


This visit was only a few hours, but I managed to get quite a bit done! My first ride back was Forbidden Journey. Following a full loop at Islands of Adventure, I walked over to Universal Studios to take advantage of other low wait times. The crowds surprised me for a Tuesday at 2 pm. I ended up being able to catch the new Jason Bourne Stuntacular show. The showed wowed me compared to the previous Terminator show of a similar variety.


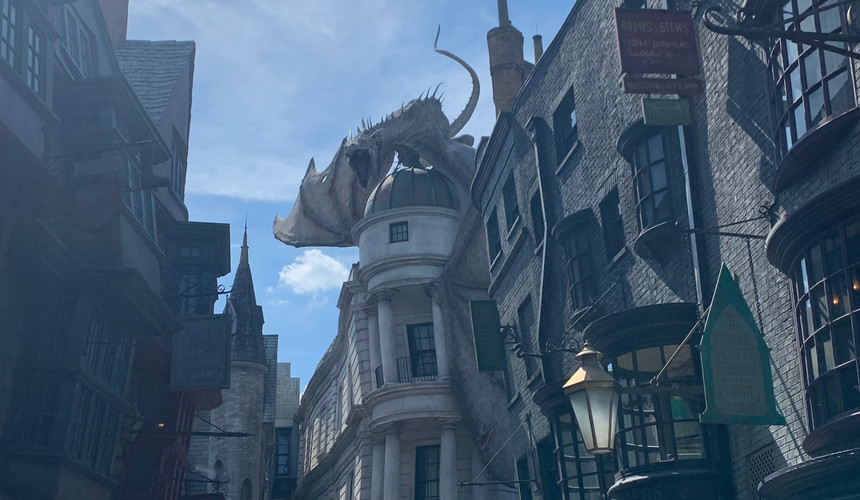
After that, I made my way to Diagon Alley to ride Escape from Gringott's. While I couldn't bring my camera on any rides, I can promise you they are still as fun as ever! My last ride of the day was Revenge of the Mummy - one of my favorite rollercoasters! I did a lot of walking, people watching, and soaking in the theme park atmosphere.


Some tips if you are traveling back to a theme park for the first time in a long time!

  1. Bring lots of water! Florida will be hotter than you remember!

  2. Get ready for a lot of walking. If you can, add in some additional walking to your routine before visiting.

  3. Make sure you carry sunscreen. It's all fun and games until your sunburn the next day. There is hardly any shade at theme parks so keep reapplying your sunscreen throughout the day.

Below are some of my favorite snapshots that I took throughout the day. Something I really enjoy about a solo park trip (which I have only done a handful of times) is how much more time I take to notice the little details.


I hope you enjoyed coming along with me to experience the theme parks again for the first time in a very long time! It was definitely a different type of experience, but now that I am vaccinated I am sure I will back again soon! If you want to know the next time I am at the parks, follow me over on Instagram! I post stories of most of my adventures in real-time. Let me know in the comments which snapshots or stories you are looking forward to seeing me capture on paper from my theme park adventure!

This layout may easily be one of my all-time favorites from this kit and we aren't even halfway through the month yet! Five photos on a layout may seem daunting, but it is totally doable! In my process video below, I explain my idea behind choosing one large photo and four smaller photos. Join me later in the blog post to learn more about the story of these photos and my layering process!


This Crate Paper pattern really caught my eye out of my stack of papers in my July 2021 HTKAKWS kit. The blush tone and yellow against the pop of blue and green photos made for an interesting combination.


When it comes to colors, we often try to find something that will go with our photos. This time I also considered what colors go along with the feeling and mood of the story I was trying to tell on this page. Everything you put onto a page can help tell your story a little bit more.


I am not the queen of layering stickers and ephemera by any means, but I think I am getting better at it! You will have to forgive me for some crooked alignment on this layout. I was having so much fun putting it together that it got a bit wonky along the way!


When it comes to layering, a little overlap can make the world of a difference. Layers don't have to be directly on top of each other to give the effect. Slightly offset pieces that are just barely touching can look like a sophisticated layered masterpiece! Take the star in the photo above for example. This element slightly layers with the title sticker, the Saturday sticker, and the puffy star sticker. It is now an interconnected piece for a larger portion of the layout!


This layout captures a lot of joyous moments and I wanted my elements on this page to reflect that. So happy and bright yellows and pinks did the job I think. What do you think of these weird color choices?


I hope you enjoyed this fun five-photo layout! Multi-photo layouts are my faves and I can't wait to experiment with some more unique print sizes soon. Keep up with me over on Instagram to follow along with my printing adventures (and maybe mishaps!).


Supply List:*Purchasing through some of these links is part of an affiliate program and I will receive a small portion of the sale at no additional cost to you.


bottom of page